# Calendly

### **👉 Prerequisites**

* You must be a Calendly user
* You should have Calendly scheduling links configured in your account
* Your Storylane workspace must have CTA functionality enabled

### **👉 Integration Features**

**Seamless Booking**

* Direct scheduling without leaving the demo experience
* Live Calendly calendar integration within Storylane interface
* Multiple CTA placement options for optimal conversion

**Streamlined Workflow**

* No platform switching required for prospect booking
* Scheduling opens directly within the demo tour window
* Maintains demo context throughout the booking process

### **👉 The Setup**

{% @storylane/embed subdomain="app" linkValue="kionsujdql0p" url="<https://app.storylane.io/share/kionsujdql0p>" %}

#### **Brand CTA (Header Link)**

1. **Access settings** → Navigate to Workspace Settings
2. **Configure header** → Scroll to "Header Link on the Page" section
3. **Add scheduling** → Enter header text and Calendly scheduling URL
4. **Save changes** → Header link appears in the top-right of published demos
5. **Test integration** → Clicking the header opens the Calendly scheduling page

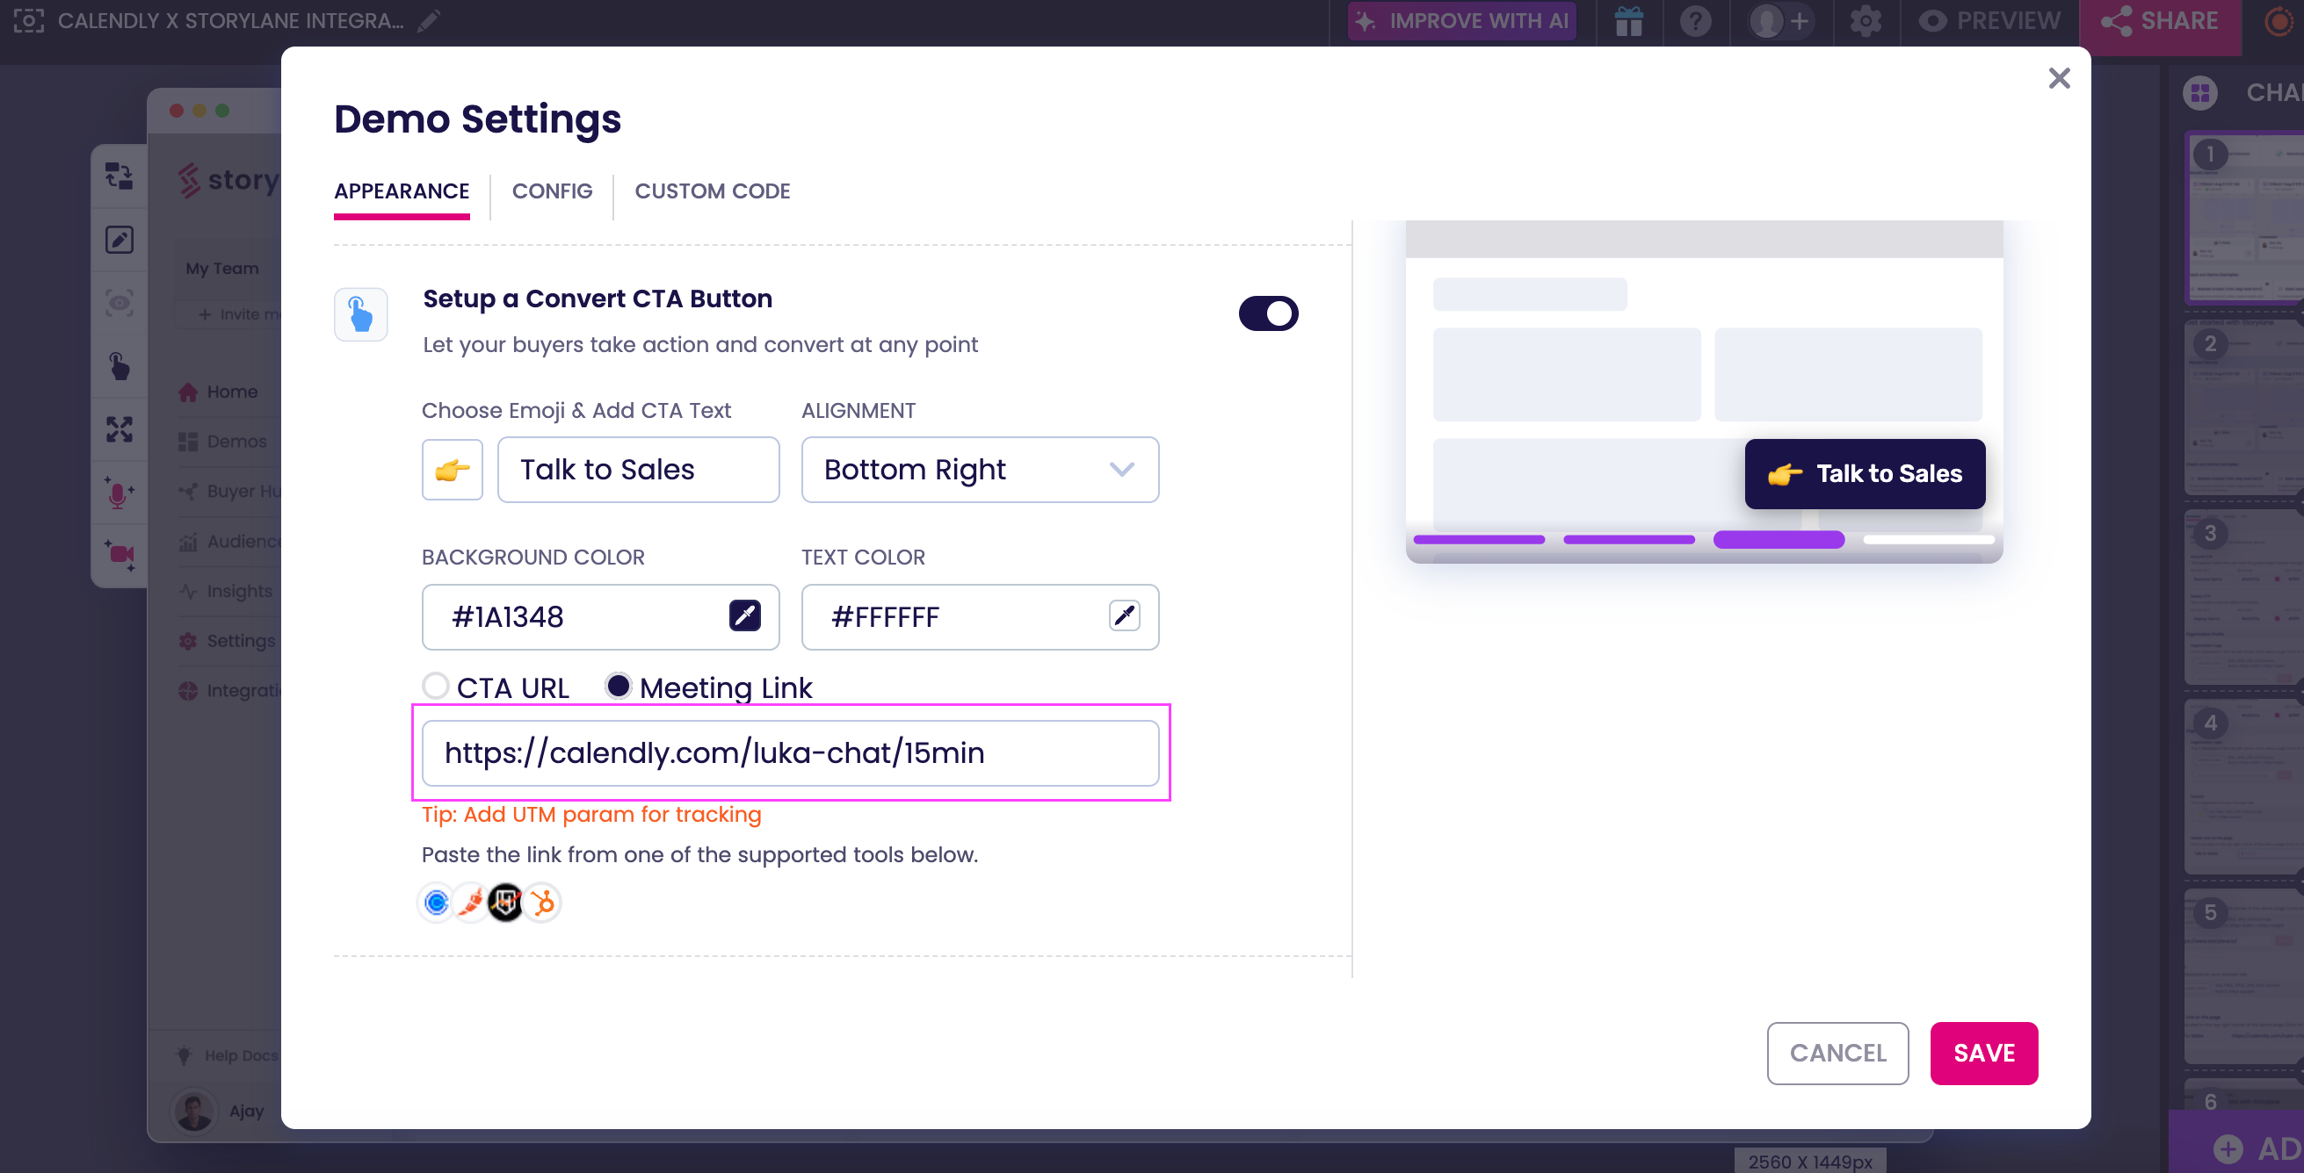
#### **Convert CTA (Persistent Button)**

1. **Open demo editor** → Select Demo Settings from editor toolbar
2. **Setup CTA** → Enable "Setup a Convert CTA Button"
3. **Choose meeting link** → Select "Meeting Link" option from dropdown
4. **Add scheduling URL** → Paste Calendly scheduling link
5. **Publish demo** → CTA appears at bottom-right of demo tour
6. **Verify functionality** → CTA opens scheduling within demo window

<div align="left"><figure><img src="https://content.gitbook.com/content/2sKIxGF28KpCOEu2HGiB/blobs/GfQJKFBydW53dOmWM15Q/Screenshot%202025-09-09%20at%2011.20.14.png" alt="" width="563"><figcaption></figcaption></figure></div>

#### **Demo CTA (Guide Modal Buttons)**

1. **Select modal** → Choose Text Modal or Lead Form in demo
2. **Configure button** → Click button to access "Go To" settings
3. **Set meeting option** → Choose "Meeting Link" from dropdown options
4. **Enter scheduling URL** → Add Calendly scheduling link
5. **Save configuration** → Click checkmark to confirm settings
6. **Publish changes** → Modal CTA now links to scheduling interface

<div align="left"><figure><img src="https://content.gitbook.com/content/2sKIxGF28KpCOEu2HGiB/blobs/JupfIFYEvQMIy3cs6pj8/Screenshot%202025-09-09%20at%2011.21.51.png" alt="" width="563"><figcaption></figcaption></figure></div>
