# Storylane App for Salesforce
The Storylane App for Salesforce streamlines demo sharing by allowing users to log into Storylane, generate a demo URL, and automatically copy it to their clipboard, directly from Salesforce.
There are two options/views to access Storylane in Salesforce and share demos:
* [**Button View**](#option-1-button-view): Add a "Storylane Demo" quick action button to the Opportunity record page.
* [**Tab View**](#option-2-tab-view): Add the Storylane Lightning Web Component (LWC) as a separate tab on the Opportunity record page.
### Prerequisites
1. **Install the App**\
To get started, install [the **Storylane App for Salesforce** from the Salesforce AppExchange](https://appexchange.salesforce.com/appxListingDetail?listingId=afc912b9-7143-410d-a2f5-8ca49c9b9ceb)
2. **Integrate Storylane with Salesforce**\
For the app to work seamlessly, you must [integrate Storylane with Salesforce](https://app.storylane.io/integrations) to enable API-level data sharing.
### **How it Works?**
Here is a quick interactive demo of how it works 👇
{% @storylane/embed subdomain="renee" linkValue="2vzyiqakolbh" url="" %}
### **Option 1: Button View**
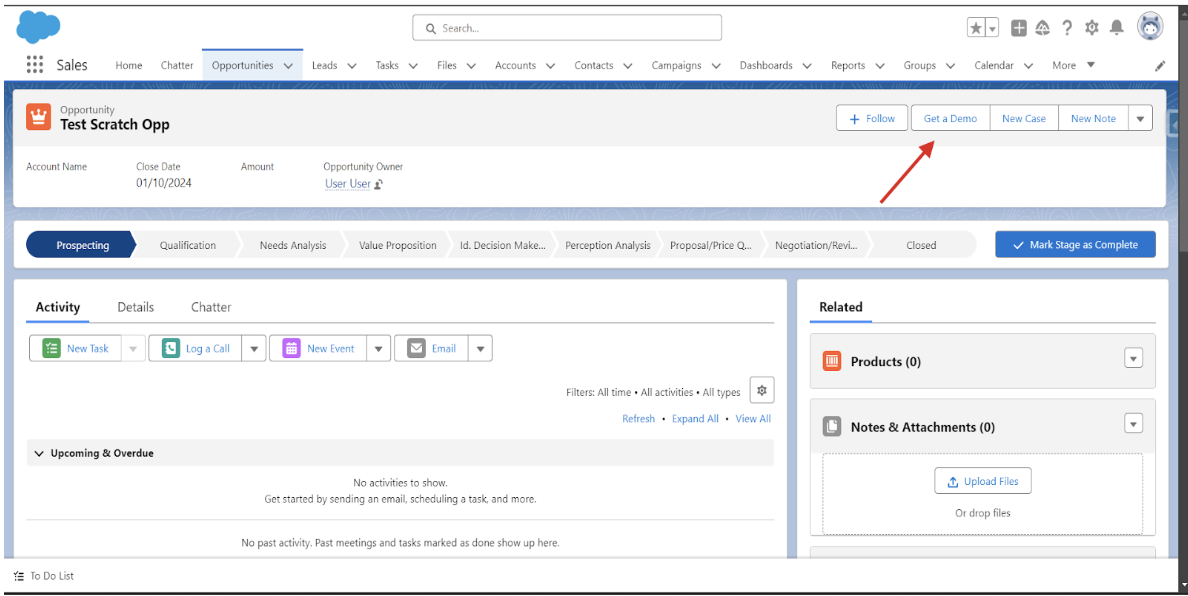
1. **Add the "Storylane Demo" Button**
* A custom button ("Get a Demo") is added as a Quick Action on the Opportunity record page.
* When clicked, the iframe loads the Storylane login page directly within Salesforce.
2. **Log in to Storylane and Browse Demos**
* Click the **“Get a Demo”** button on the Opportunity record page.
* The **Storylane login page** will load in the iframe. Log in using your credentials.
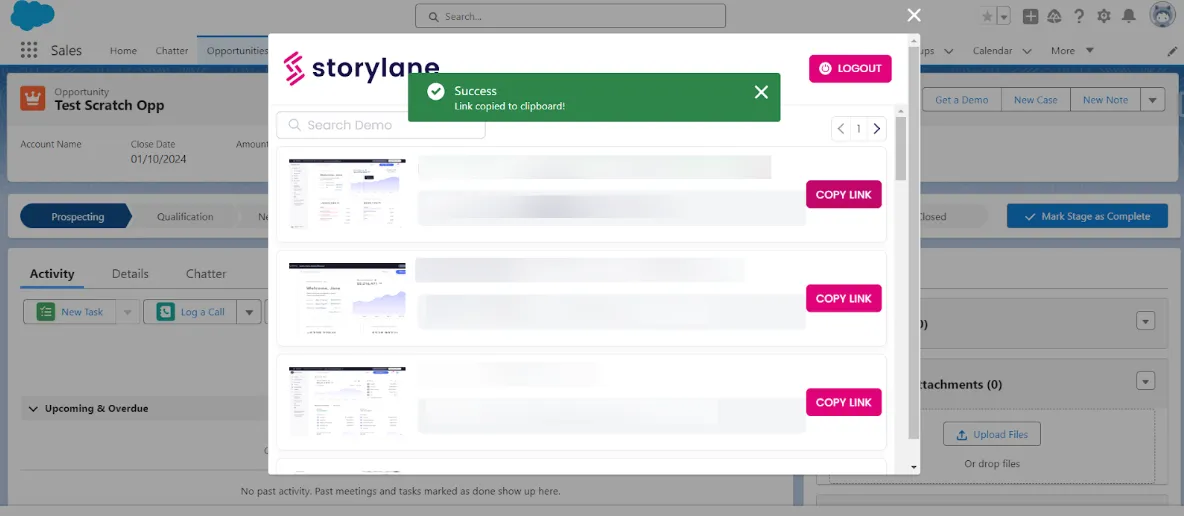
* After logging in, browse through the demos to select the right one.
3. **Generate and Copy Demo Links**
* Click the **“Copy Link”** button next to your chosen demo.
* The opportunity-specific data (e.g., **Opportunity ID and Name**) is automatically and securely sent to Storylane.
4. **Receive the Demo URL**
* Storylane generates a **default demo URL** based on the transmitted Opportunity details.
* The URL is then sent back to Salesforce in real-time.
5. **Copy the URL to Your Clipboard**
* Once the **default demo URL** is received, it is automatically copied to your clipboard.
* You can now seamlessly share the demo link with your prospects.
{% hint style="info" %}
The behavior of the "Copy Link" Button
* **No Opportunity Contact Roles**: The Storylane Demo Base URL is copied to the clipboard.
* **Opportunity Contact Role**: The Storylane Demo **Tokenized** URL is copied to the clipboard.
{% endhint %}
### Option 2: Tab View
You can add the "Storylane Demo" LWC to the Opportunity record page in a separate tab.
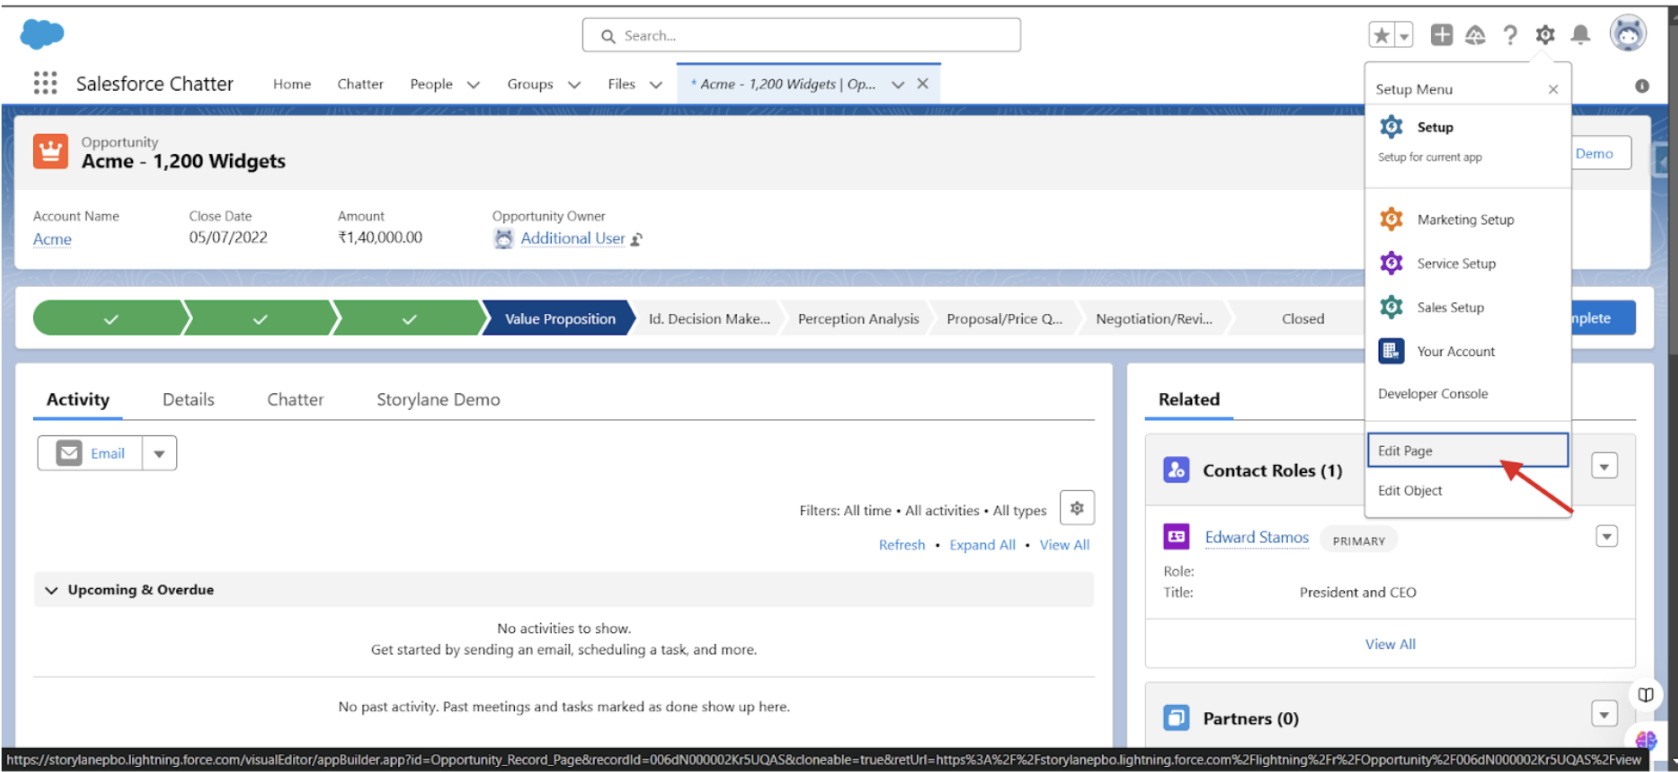
1. **Navigate to Opportunity Record Page**
* Access the Opportunity record page
* Click the "Edit Page" button
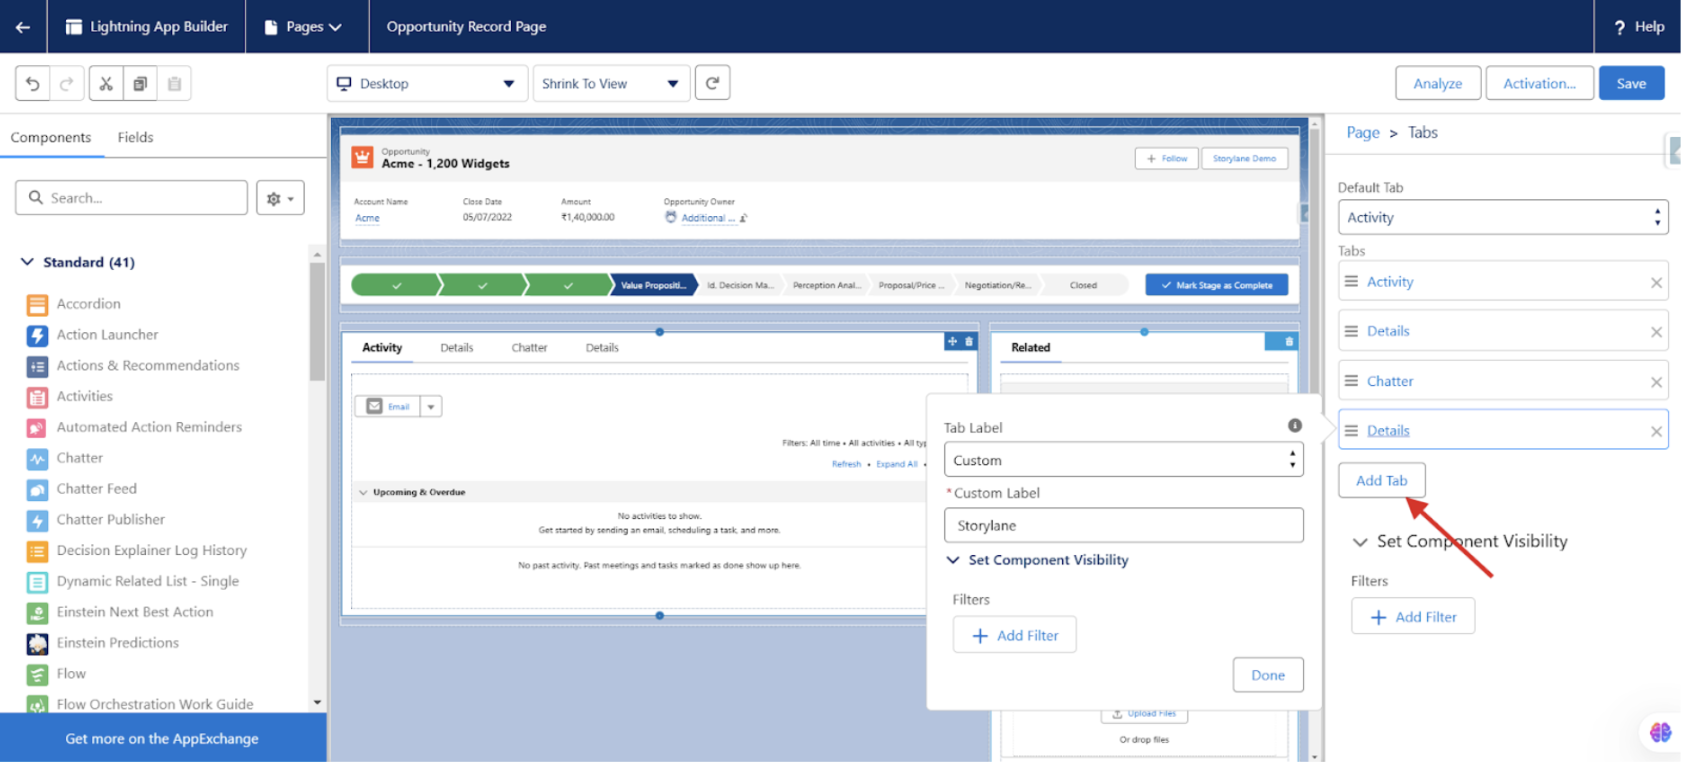
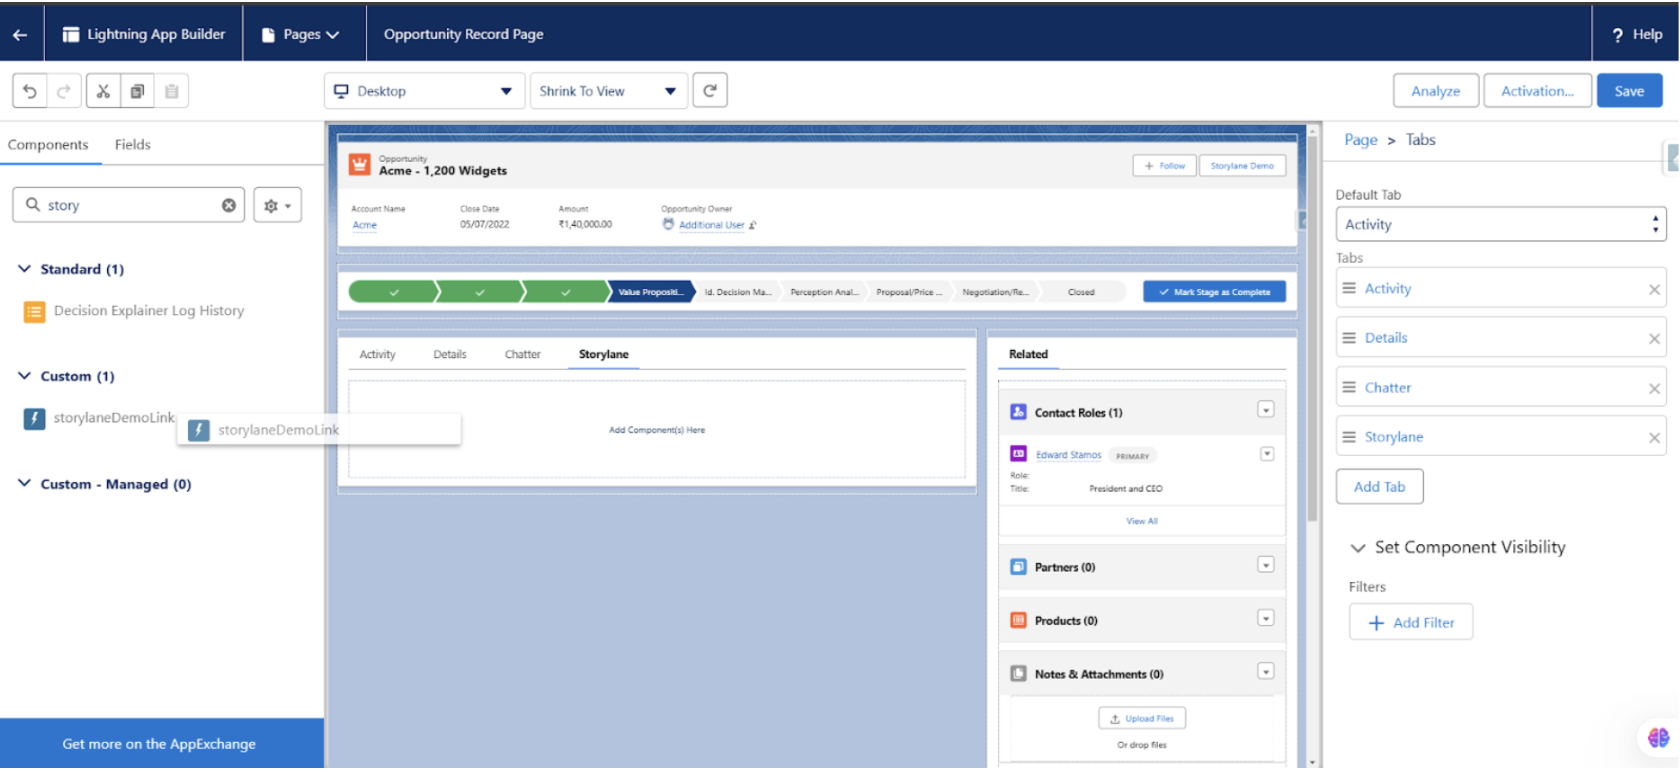
2. **Add a New Tab for Storylane**
* Locate the tabs section
* Create a new tab dedicated to Storylane
3. **Add the Storylane LWC to the Tab**
* Drag and drop the Storylane LWC component into the new tab
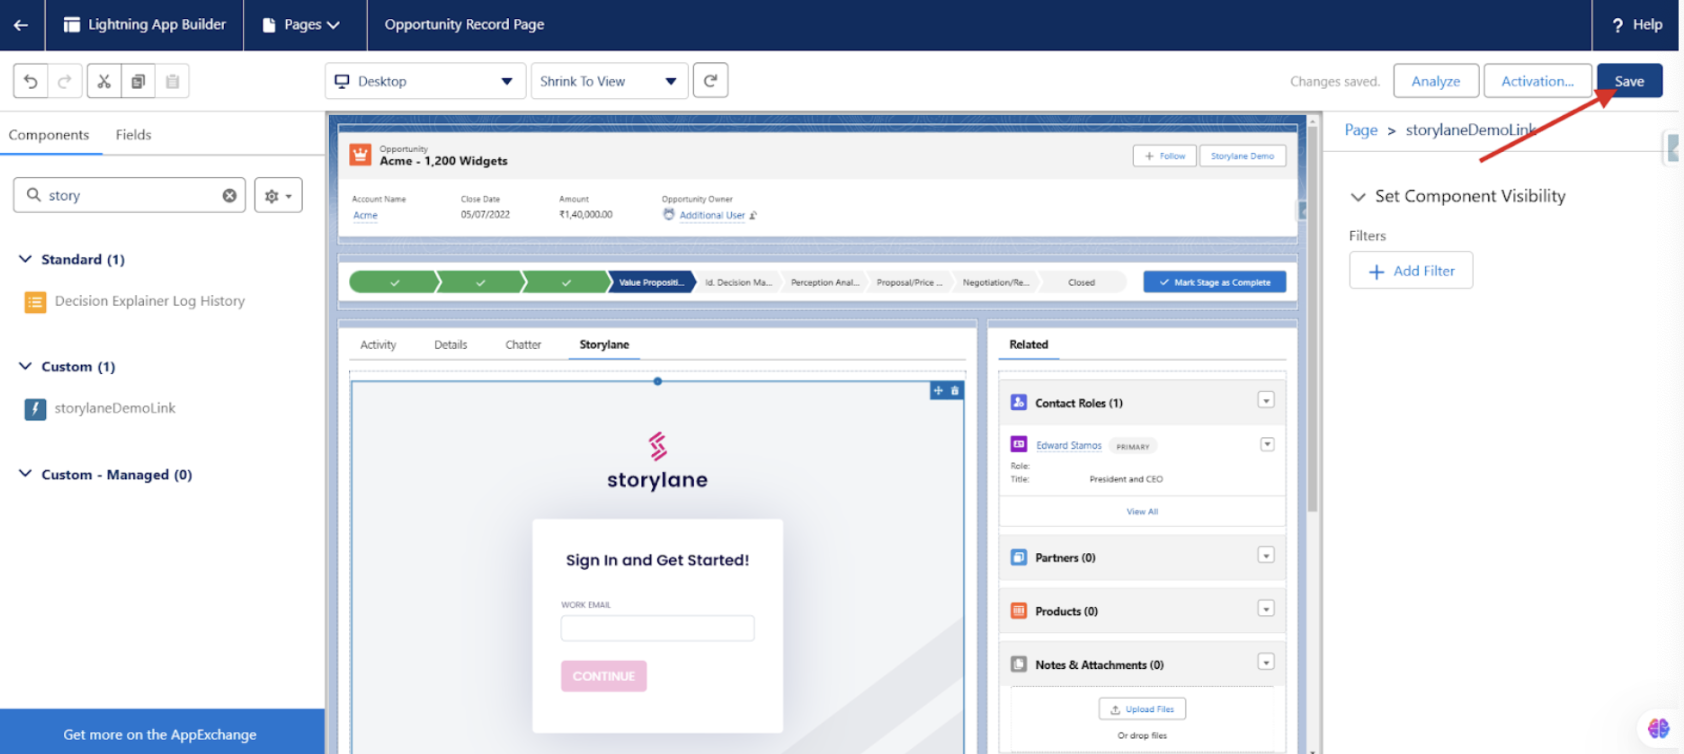
4. **Activate and Save the Page**
* After completing these steps, you can access Storylane directly from the Opportunity record page tab.
5. **Log in to Storylane and Browse Demos**
* Click the **“Get a Demo”** button on the Opportunity record page.
* The **Storylane login page** loads in the iframe. Log in using your credentials and browse demos.
6. **Generate and Copy Demo Links**
* Click the **“Copy Link”** button next to your chosen demo.
* The opportunity-specific data (e.g., **Opportunity ID and Name**) is automatically and securely sent to Storylane.
7. **Receive the Demo URL and Copy the URL to Your Clipboard**
* Storylane generates a **default demo URL** based on the transmitted Opportunity details.
* The URL is then sent back to Salesforce in real-time.
* Once the **default demo URL** is received, it is automatically copied to your clipboard.
* You can now seamlessly share the demo link with your prospects.
***
## **Storylane Permission Set: Resolving Apex Class Access Issues for Salesforce Users**
**Issue ->** Salesforce users with restricted permissions may encounter **Apex Class access issues** when using Storylane features.
**Solution ->** To resolve this, a **Salesforce Administrator** must assign the **Storylane PermissionSet** to the affected user.
**Steps to Assign the Storylane PermissionSet:**
1. **Log in** to Salesforce as an **Administrator**.
2. Navigate to **Setup > Users > Permission Sets**.
3. Locate **Storylane PermissionSet** in the list.
4. Click on the **permission set**, then select **Manage Assignments**.
5. Click **Add Assignments** and select the users who need access.
6. Click **Assign** to apply the required permissions.
***
{% hint style="info" %}
If you need help or have any questions, feel free to contact us at .
{% endhint %}
---
# Agent Instructions: Querying This Documentation
If you need additional information that is not directly available in this page, you can query the documentation dynamically by asking a question.
Perform an HTTP GET request on the current page URL with the `ask` query parameter:
```
GET https://docs.storylane.io/integrations/integrations/salesforce/storylane-app-for-salesforce.md?ask=
```
The question should be specific, self-contained, and written in natural language.
The response will contain a direct answer to the question and relevant excerpts and sources from the documentation.
Use this mechanism when the answer is not explicitly present in the current page, you need clarification or additional context, or you want to retrieve related documentation sections.