> For the complete documentation index, see [llms.txt](https://docs.storylane.io/llms.txt). Markdown versions of documentation pages are available by appending `.md` to page URLs; this page is available as [Markdown](https://docs.storylane.io/editing-demos/demo-settings.md).
# Demo Settings
Settings that apply to your published demo
**To access these settings, start by clicking the gear icon. Here's what you can do in there:**
* [Setup Navigation](#id-1.-setup-navigation)
* [Demo Themes](#id-2.-demo-themes)
* [Auto Play](#id-3.-auto-play)
* [Private Demo Access](#id-4.-private-demo-access-available-for-enterprise-plan)
* [Mobile Player](#id-5.-mobile-player)
* [Frame Color](#id-5.-frame-color)
* [Display Title](#id-6.-display-title)
* [Small Screen Warning](#id-7.-small-screen-warning)
* [Autoscale Demos](#id-8.-autoscale-demos)
* [Background Music](#id-9.-background-music)
* [Defaults](#id-10.-defaults)
* [Share Page Background](#id-11.-share-page-background-colour)
#### **1. Setup Navigation**
Navigation helps users track their progress in a demo and easily jump between non-sequential steps. Toggle colored step indicators under **Appearance.**
#### **2. Demo Themes**
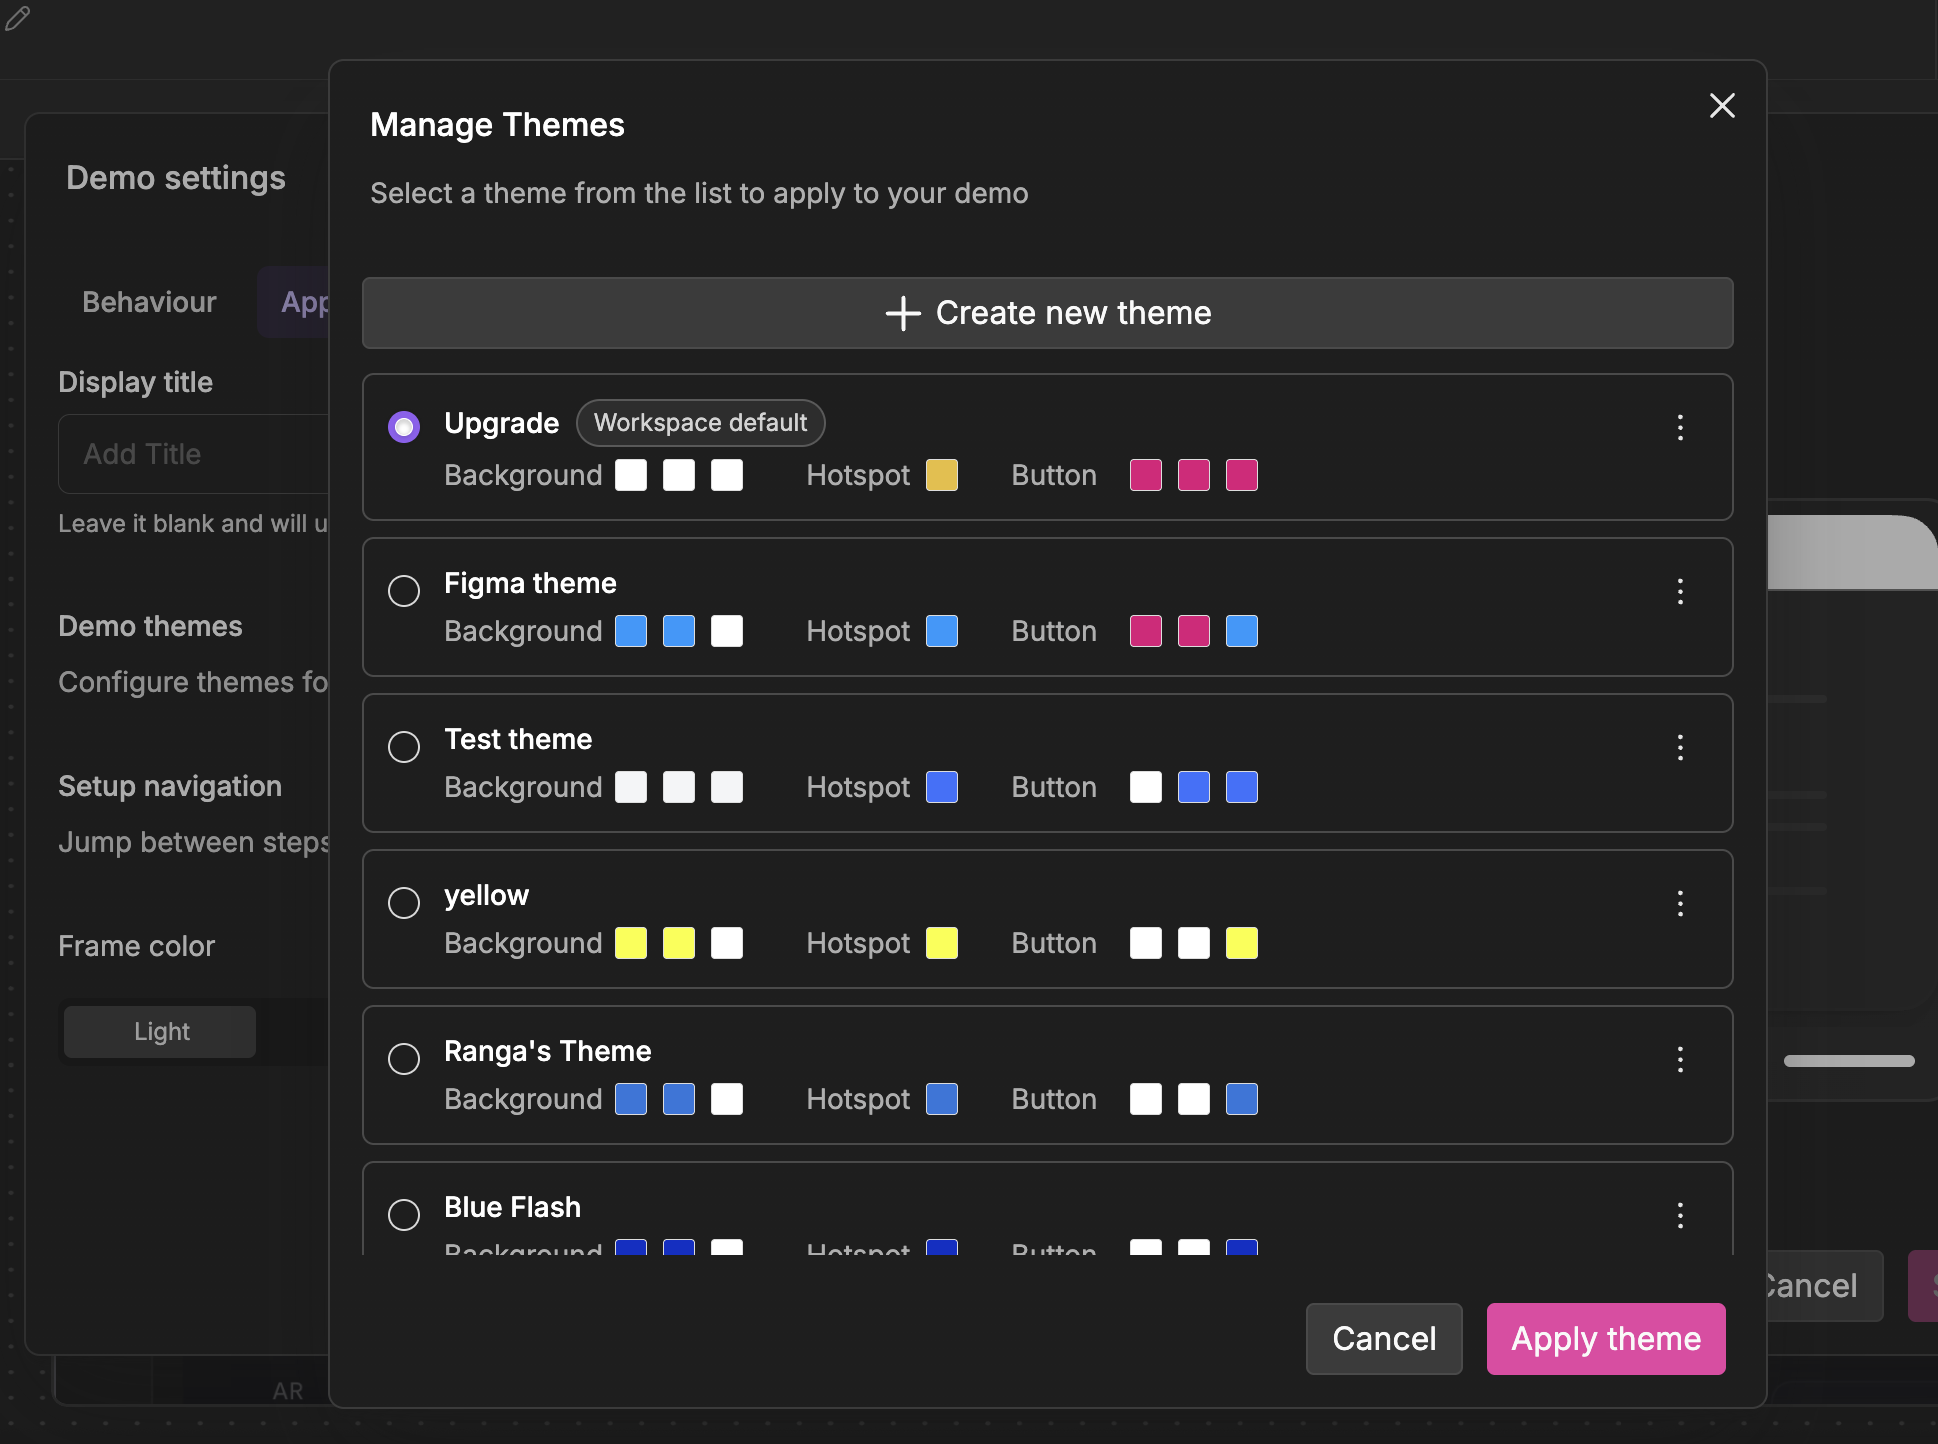
Toggle your default demo colors and other parameters globally via Demo Themes. Apply across Hotspots, Tooltips, and Modals. [Click here to learn more about branding](/account/branding.md).
#### **3. Auto Play**
Auto-play advances your demo to the next step after a specified period of inactivity. You can add a custom delay or use the auto-delay, where the delay is adjusted automatically based on the amount of text or speech in the step. Additionally, toggle on ‘loop demo automatically’ - perfect for keeping eyes on your screen at the next conference booth.
**⏱️ Step level Auto Play**
Automatically advance to the next step after a set time delay. You can choose between **Auto** — where the delay is adjusted based on the text or speech length of the step — or set a **Custom** time of your choice.
#### **4. Private demo access -** Available for the Enterprise plan
This is an enterprise security feature. When allowed, only authenticated users in your Storylane account can access this demo.
#### 5. Mobile Player📱
Mobile demos now play inside a realistic phone frame, so viewers see your product exactly the way it looks on their device. Turn it on from **Demo Settings → Mobile**, and choose between a **Light** or **Dark** frame style to match your product. Mobile frame is **on by default** for every new mobile demo — nothing extra to set up. Already have a mobile demo? Just flip the toggle to add the frame retroactively.
{% embed url="" %}
#### **5. Frame Color**
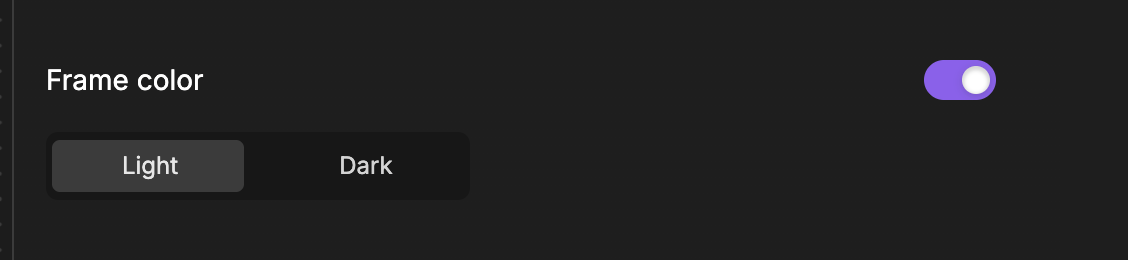
Toggle between Light Frame and Dark Frame, or No Frame under Demo Settings (Screenshot demos only) To remove the demo frame or "header", toggle frame color "off".
#### **6. Display Title**
Adding a Display Title distinguishes what your viewers see vs the file name in Storylane.
#### **7. Small Screen Warning**
Alerts your viewers when they are visiting your demo on a screen that is smaller than recommended. You can specify the width at which the warning appears (default is 800px).
#### **8. Autoscale demos**
* Toggle on to automatically adjusts your demo to match the original capture size
* Demos viewed only within your organisation, SSO, security, authentification
* Toggle on so only authenticated users in your Storylane account can access this demo.
{% @storylane/embed subdomain="app" linkValue="exa3ieabjjmj" url="" %}
#### 9. Background Music
Create a more immersive experience by adding background music to your demo. Choose from a curated library of tracks or upload your own, and adjust the volume to the right level.
To set it up, go to **Demo Settings → Background Music**, toggle it on, and select a track from the dropdown — options include Spring Energy, Digital Horizon, Tech Ambient, Lo-fi Focus, and more. You can also **Upload** your own audio file.
{% hint style="info" %}
If you need help or have any questions, feel free to contact us at .
{% endhint %}
#### 10. Defaults
Set workspace-level defaults so every new demo starts pre-configured with your preferred setup — no need to repeat the same settings on each demo individually.
To access this, go to **Settings → Workspace → Defaults**. From here, you can configure:
* **First & Last Steps** — set a default opening popup and closing CTA that anchors every new demo
* **Default Interaction Guides** — apply a consistent guide style across all new demos
* **Autoplay** — control whether new demos auto-advance by default, and at what pace
* **Secure Link** — require viewers to authenticate before accessing your demos by default
{% hint style="info" %}
You can now set up your background music under **Defaults** inside your **Settings** tab, so you don't have to configure it separately for each demo.
{% endhint %}
{% @storylane/embed subdomain="app" linkValue="fejenwoodxzg" url="" %}
#### 11. Share Page Background
Customize the backdrop shown around your demo on the share page. Choose from preset colors and gradients, or create your own **custom gradient** using the color picker to match your brand.
Find it in **Demo Settings → Appearance → Share Page Background**
---
# Agent Instructions
This documentation is published with GitBook. GitBook is the documentation platform designed so that both humans and AI agents can read, navigate, and reason over technical content effectively. Learn more at gitbook.com.
## Querying This Documentation
If you need additional information that is not directly available in this page, you can query the documentation by asking a question.
Perform an HTTP GET request on the following URL with the `ask` and `goal` query parameters:
```
GET https://docs.storylane.io/editing-demos/demo-settings.md?ask=&goal=
```
`ask` is the immediate question: it should be specific, self-contained, and written in natural language.
`goal` is what the user is ultimately trying to achieve, the reason they need the answer. Sharing it helps GitBook give you a better, more relevant answer. A goal is most helpful when it describes the outcome the user wants rather than restating the question. For example, with `ask=how do I create an API token`, a goal like `automate deployments from our CI pipeline` lets GitBook tailor the answer to that use case.
The response will contain a direct answer to the question and relevant excerpts and sources from the documentation.
Use this mechanism when the answer is not explicitly present in the current page, you need clarification or additional context, or you want to retrieve related documentation sections.